Thursday, 8 August 2019

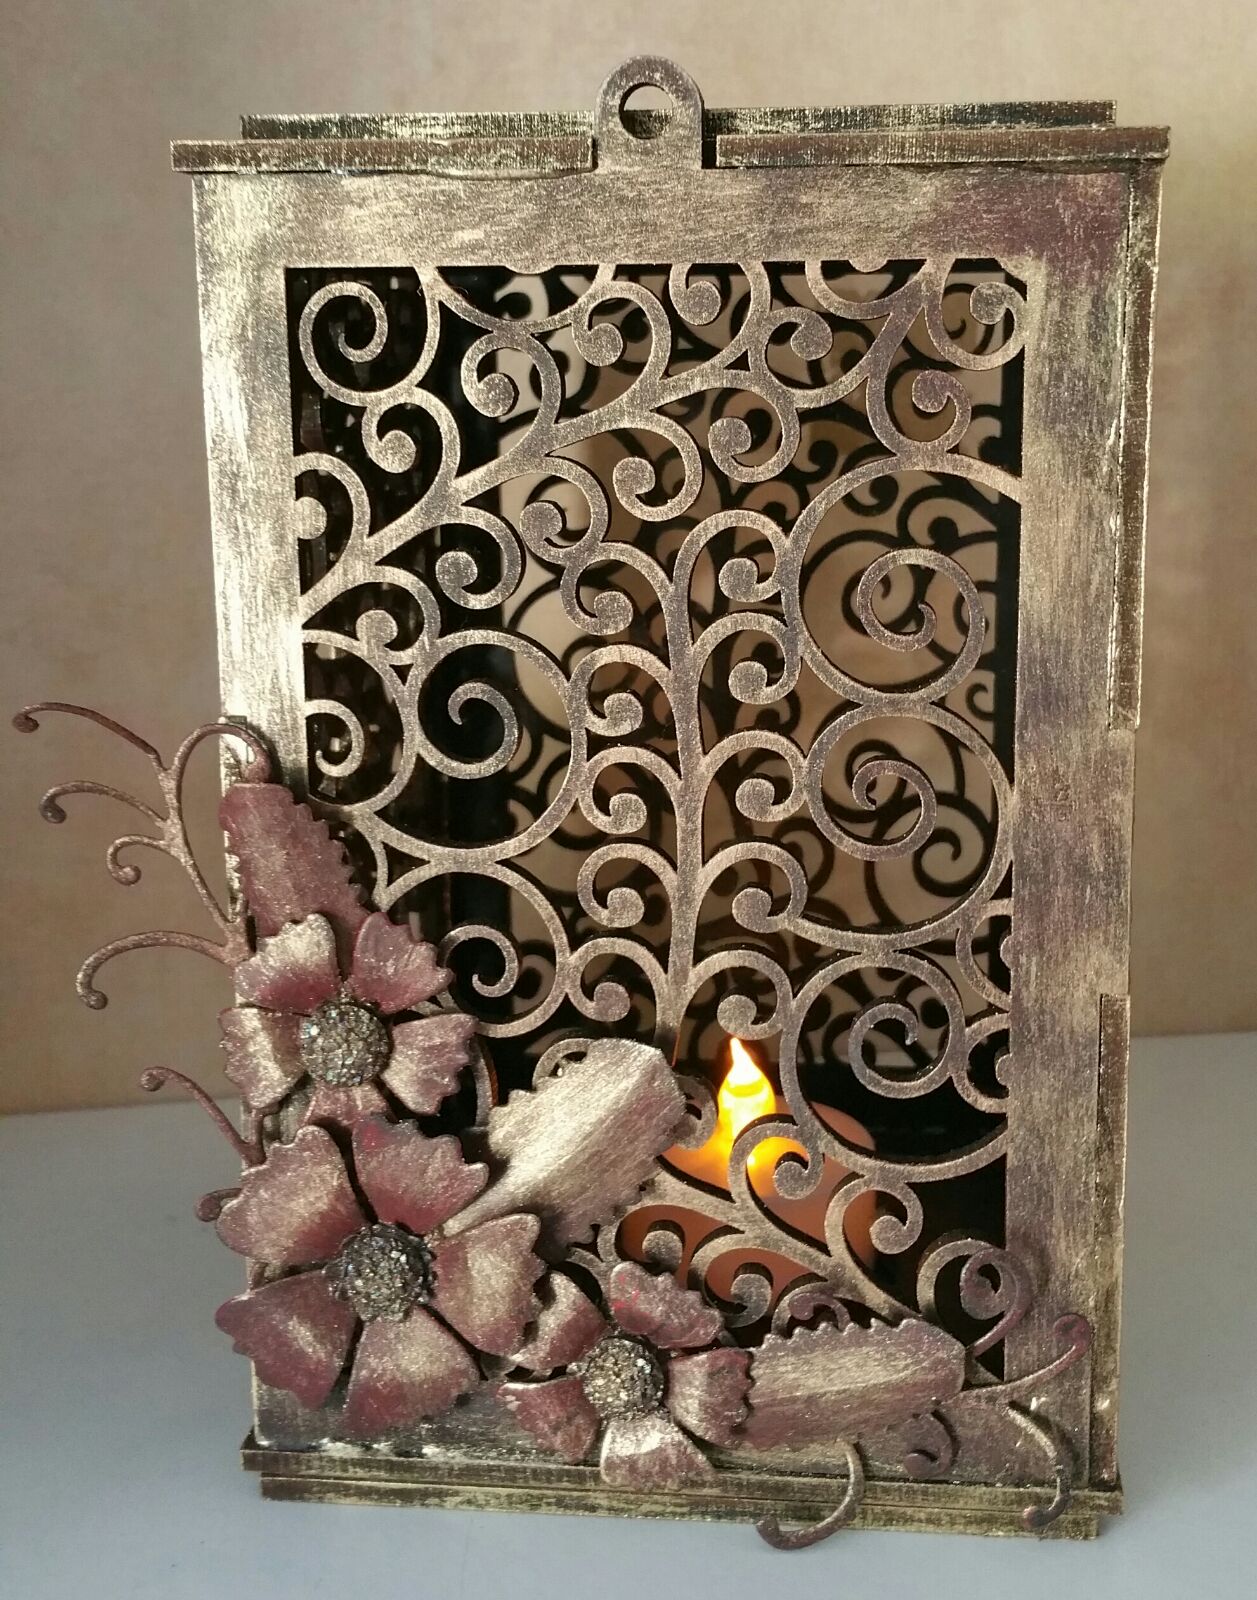
MDF Tag


Hi everyone

Well, where did that week go?   I seem to have done loads and achieved nothing, but hey thats the way it goes sometimes. 

This afternoon, a large cuppa and a custard cream (or two) found there way with me into the studio for another crafty session.    Yet again I found myself drawn to the Craftascope goodies designed by Nick Roberts and this tag is the result.


The mdf tag was painted with black gesso, one dry the flower orbit stencil was laid on top and Izink organ and green texture past was used through to create the design.     While that was drying a stamping platform was used to stamp one of the flowers from the Bloom and Grow set with spiced marmalade distress ink, the ink was then drawn in using a water brush, once dry the flower was cut out. Cuts were also made in between the petals to give movement. 

The words Imagine, Trust and Believe, also Craftascope stamps were stamped using black archival ink onto white card, once dry they were cut out, edged with spiced marmalade distress ink and layered onto green then black card then added to the tag with foam pads. 

Izink diamond was painted on the tips of the petals, a gem coloured with yellow alcohol ink was added along with two metal leaves underneath, the who think was added to the tag with glue gel.

There were other projects started but are work in progress to be finished and shown another day.

Well time to sort dinner out for the others so until next time........

Happy crafting xx


Saturday, 27 July 2019

My Boy Lollipop......

Hi everyone

Had a lovely afternoon yesterday in the studio just playing around with products and came up with this art journal design using Craftascope products designed by Nick Roberts.

I used stamps from the Such a Card set and the Retro Fun 2 from the collection.


Products used where Dylusion paints, Craftascope stamps and stencil, black gesso, white gel pen, Izink coloured texture paste, a music stencil from my stash, circle die, glossy accents, clear embossing powder and distress oxide ink pads.    

Colour was laid down using the paints, black gesso was used through parts of the stencil.  Once dry white gel pen was used on the black retro shapes.  The swirls on the lollipops were stamped using distress oxide and heat embossed with clear powder, then cut out with a circle die and coloured using distress oxide inks. A thin piece of white card was used as a stick to make them look like lollipops and they were stuck onto the pages with foam pads and wet glue.  The letters were printed out, coloured and glossy accents was applied, when dry I then cut each one out and used foam pads to add them to the pages.    The texture paste was used through the music stencil to add some notes.

The stamps and stencil from Craftascope are available from Nick's Etsy store here  Why not pop over and take a look, great fresh designs that are so versatile and will work alongside so many other products in your stash.   

It's just a fun piece of work that I enjoyed designing, sometimes nice not to plan but to see where the creative process takes you.

Until next time.....................
Happy crafting xx

Thursday, 4 July 2019

MAWTT Stars and Stripes Theme


Hi everyone

I've just had a couple of months out due to family circumstances and have really missed my crafting but hopefully back now.

My first project back is for the Moving Along With The Times blog, the theme is Stars and Stripes which was picked by Jenny.

I used scrapbook papers from Piggy Tales Twinkle Twinkle Little Star collection. The two I used were Shiney Stars and Sky Lights, they are double sided and more like card than paper.

They were cut down to size, the edges were distressed using a sanding block and slightly coloured with Antique Linen Distress Oxide ink.   The large silver star was made by painting glue through a mask then sprinkling with glitter.

The words, Dream big, Shine bright, Sparkle more were printed, cut out and edged with silver gilding wax before being matted onto silver card.  These sentiments were placed onto the card using foam pads.   

A few self adhesive crystal gems were then placed on the card.


Why not pop over to the MAWTT blog to see the cards made by other Design Team members and while you are there we would love you to enter the challenge.

Thank you for taking the time to visit my blog, please leave a comment if you have a moment.

Until next time........................

Happy crafting x

Wednesday, 17 April 2019

Scrapy Land Challenge #112

Hi everyone

Hope you are all keeping well.

It's time for Scrapy Land Challenge #112, why not pop over and enter - anything goes as long using any brand of die that Scrapy Land sells, there are always two winners so well worth giving it a try.

Here is a project that I have just started so showing the front page of the album


The dies used are Filigree Heart and Layered Flowers, both by Sweet Dixie. All die cuts, the mdf word and the background were spritzed with Cherry Red Dylusions spray. Metal leaves and gems were added to add texture.  Everything was stuck down using Pinflair glue gel.

This is a project that will evolve over the next few months in between other crafty makes. 

Craft studio now needs a tidy up so until next time...............

Happy crafting xx

Thursday, 11 April 2019

Diamond Swing Card

Hi everyone

It's time for a new Team B MAWTT Challenge, the theme for this one is "That Spring Feeling" and was chosen by Judith, here is the card I made as a member of the DT......

Front view


Open view


The card was made using dies from the Diamond Swing Create a Card from Crafter's Companion , the Best Wishes sentiment was cut in two colours of card using Dawn Bibby Creations dies and put together to create a drop shadow. 

A butterfly was added along with faux flowers which had been slightly coloured using Wilted Violet Oxide ink and a waterbrush. 

Why not pop over and enter the challenge here

Until next time..............

Happy crafting xx


Wednesday, 3 April 2019

Scrappy Land Challenge #111

Scrapy Land Challenge #111


www.scrapyland.com

Hello everyone

I was so excited to be accepted onto the Design Team for the Scrapy Land Challenge Blog and here is my first design for Challenge #111.


The cute little boats and ships wheel were cut from a Sue Wilson die set called Fillables - Nautical Accessories which can be found on the Scrapy Land website .   I cut the boats out twice in white card, twice in red card and once each in yellow and green paper. The sails were cut out and paper pieced on top of the white boats, a small piece of black card was cut for the bottom of each boat. 

The waves were created by inking through a stencil called Fancy Flourish by Craftascope using broken china and faded jeans distress oxide ink.  The stencil was moved each time it was inked through which gave the illusion of layers to create the waves.

A small cut was made for each boat to be slotted into.

The "Bon Voyage" sentiment was stamped onto a piece of white card using faded jeans oxide ink then cut with a tag die from my stash (not sure of the brand). It was then tied to the ships wheel with a piece of twine before being stuck down. 

Lastly a piece of rope was stuck down the side of the card to finish off the nautical look. 

Why not pop over and enter the challenge, you have to be in to win!

Until next time...................

Happy crafting xx


Wednesday, 27 March 2019

Create Your Own Path

Hi everyone

Happy post arrived today in the form of the Media Medley and the Blooming Marvelous collections from CraftaScope.   So a pot of tea was made and taken into the studio for the start of a play day with these exciting products designed by Nick Roberts, the stamps, stencils and dies are fantastic quality. Its worth mentioning that most of Nick's stamps are made from TPR (Thermo Plastic Rubber) which is 100% recyclable and can be used with heat allowing techniques with UTEE (Ultra Thick Embossing Powder) and more.

I designed this canvas around the sentiment from the Positive Journey stamp set "Create Your Own Pathway".


First |I put colour on the canvas using spiced marmalade, twisted citron and peacock feathers distress oxides.


Then it was spritzed with water, left for a few seconds then dried to create the background.


Twisted citron oxide ink was then sponged through the Flower Orbit stencil to create interest.  Part of one design from the Retro Fun stencil was used back to back with texture paste to create the path through the middle of the canvas. When dry colour was added using black soot and vintage photo distress crayons. The flowers and leaf was added in the bottom right corner using glue gel, these were coloured with the peacock feathers oxide and aladine diamond. 

The sentiment was stamped onto white cardstock with black archival ink, coloured with the same three oxides used on the canvas and the letter were filled in with a green spectrum noir alcohol marker. This was matted onto black cardstock and added to the canvas using foam pads. 

The two pointed hands were cut from black, blue and cream card using one of the dies from the ATC Antics die set then layered up, cut in two and attached using foam pads.

So many ideas for using these wonderful products but until next time ...............

Happy crafting.
xx


Thursday, 14 March 2019

MAWTT Butterfly Card


Morning everyone

Great news, I have returned to the MAWTT Design Team (Moving Along With The Times Challenge Blog) and here is my first card for Team B, the theme is "Bugs"


The card measures 8" x 8" is was made using the Crafters Companion Die'sire Lace Butterfly Create-A-Card die.  The image was inked using distress oxides then spritzed with water and left to dry naturally.  The die was used on a separate piece of card stock which had been coloured using Izink amethist (izink spelling) and silver pigment inks with water then left to dry, the butterfly was snipped out then layered onto the dry card using Pinflair glue gel. Down the centre of the butterfly, glue gel was also used to hold the chunky glitter pieces which give great dimension.  The Best Wishes sentiment words were die cut and put on opposite corners. 

Please pop over to the MAWTT blog to see the other Design Team makes and why not enter a card into the challenge while you are there. 

I love this colourful card and hope you do too.   

Now off to put the kettle on and tidy up so until next time..............

Happy crafting xx


Wednesday, 6 March 2019

Upcycled Frame

Hi all

This last week has been quite busy with Mum in hospital but hopefully on the mend and taking the youngest Daughter to her University interview / tour where she has now been offered a place on her chosen degree course. 

Today was the first chance to get back in my craft studio and I had just the project in mind........

From this cheap £1 frame


to this (I have covered the photo with plain paper as don't have the permission of the person to show it).


Firstly, silver gilding wax by Pebeo was used on the raised parts of the frame which already made it look so much better, then artificial flowers from my stash were pulled apart / cut up and glued on with Pinflair glue gel to make the embellishment in the corner. 

I hope you agree it has changed the look of the frame so much and was such an easy project.

Time to clear up, make a cuppa and start the dinner so until next time..............

Happy crafting xx

Monday, 25 February 2019

Vintage MDF Tag

Hi everyone

Hope you all had a good weekend, the weather here was sunny and warm so we took ourselves off for a long walk around a local National Trust park on Saturday afternoon.

Today I have been in the craft studio and this is one of the results, the details on how it evolved are further down.


A thin coat of white gesso was painted onto the mdf tag, once dry vintage photo and iced spruce distress oxide inks were blended on it to make a background and then water was dropped from my fingers and dried with kitchen towel (although the result of this ended up not being seen).  Texture paste was used through a Sheena Douglas stencil in the top right and bottom left corners to add interest. Here is a picture of the finished background before embellishments were added. 


 Four small square Tim Holtz fragments were coloured using sunset orange, meadow and espresso alcohol inks, each one then had a wooden letter attached with glossy accents and given a metallic look with Pebeo vintage gold gilding wax.  The wax was also used on the white frame, the white hearts and the heart on the pin. The dry texture paste was coloured using a vintage photo distress crayon. 


The tickets (which were roughed at the edges and tinted with vintage photo distress ink) were from an ephemera pack by Tim Holtz along with the photo image.  The key, lace, pins and metal heart were from my stash of embellishments.

Everything was then attached as shown using Pinflair glue gel and glossy accents. 

Well I hope you have enjoyed this as much as I did designing it, now for a tidy up and well earned cuppa so until next time..........

Happy crafting xx


Tuesday, 19 February 2019

Quick & Easy Birthday Card

Hi everyone

It's a bit dull here today although the sun is trying to push through the clouds. I'm in my craft studio with a nice hot cuppa, the radio on and singing (well trying to) while having a tidy up ready for the next project.

Thought I would take a break and pop on to show you a quick and easy Birthday card I made yesterday afternoon.


Using an A5 black card blank I matted and layered a piece of white card stock that was slightly smaller.   A piece of co-ordinations card stock  that was slightly smaller again was run through the Gemini machine along with a Dawn Bibby Creations stencil, this left a raised image which I sanded back.  Flat back pearls and glitter was used in the flower centres to add interest.  The Happy Birthday sentiment from the Exotic Flourish stamp set by Dawn Bibby was heat embossed with matching colour powder onto white card coloured with distress oxide ink then matted onto black, this was then added to the card using foam pads. 

I just love the colour of this card.

Really should stop putting off the massive tidy up so until next time...........

Happy crafting xx


Thursday, 14 February 2019

Time Out!

Hi everyone

Quite a few of you know I have taken time out from crafting (for a variety of reasons) but now it feels right to remove the dust sheets from my craft studio and return to what I love doing.

A brand new page on Facebook has been created where I will share hints, tips, and how to videos of crafting techniques and crafty chat, you can find the page here if you want to pop over and take a look.

I am so looking forward to get back in the crafting saddle and showing you my creations.

Here are a couple
 of my make from the last few years to bring things up to date.


Now it's time for bed so until next time......
Happy crafting x


Thursday, 2 August 2018

Love, Dream and Create Canvas


Thank you for popping by and taking a look.

Hopefully this is me back to crafting & blogging more often again, after six months away from it (for all sorts of reasons) apart from a few bits and bobs I haven't really created anything.

Anyway, I decided to take myself off into my craft studio yesterday for a well earned bit of me time and this is what I ended up with.


I used distress oxide inks, stencils, stamps, texture paste, chipboard letters, metal butterfly and key.  

Now looking forward to tidying up the studio, creating more and blogging how to videos, tutorials and craft in general.   

Jack is back!!

Now it wouldn't be me if I wasn't about to go and make a cuppa so until next time........

Happy crafting xx


Thursday, 5 July 2018

Pirate Card - MAWTT Challenge Blog

Good morning, hope you are all well and enjoying the sun, it has definitely been a hot summer.

Well it was my turn to host the Moving Along With The Times challenge blog (MAWTT) this time so I chose a male theme.   So many crafters struggle with male cards and items that I thought some inspiration would help.

Here is my card, a pirate theme with a boat charm all ready for a little boys Birthday.


This card was made from a Hunkydory kit that I had in my stash, a button and boat charm were added using some twine and sparkly glitter was put on the crest of the waves using a quickie glue pen.

I will probably add the little boys name or age on the right of the card amongst the clouds when the time comes.

Why not pop over to the MAWTT blog and see makes from the other members of team A and while there please join in the challenge.

Off to make a nice cool drink so until next time.......

Happy crafting xx


Monday, 11 June 2018

MAWTT Blog Post


Well Hello......

It's been a while since I posted anything, in fact it's been too long since I actually had time to craft in general.

Well, the craft studio has been cleared up, dusted and new benches are in - Jack is back (hopefully!). 

To get started, here is a quick card made for the MAWTT blog.  It was Zoe's turn to choose the theme for Team A this time and she chose "Girls Birthday".   My card has been made for a friends Daughter who has gone to University to study fashion design and she adores anything vintage.


Please pop over and take a look at the other DT Member makes and why not enter the challenge while you are there 😊

As usual I am off to put the kettle on so until next time......

Happy crafting x


Thursday, 1 March 2018

Orange Art

Hope you're all safe, warm and managing to get some crafting in during this severe cold weather.  I must admit to spending the day in my craft studio yesterday apart from popping out to keep filling the tea pot  :) 

Here is the one of the items I made, love the bright orange on the black canvas. 


Firstly the white canvas was painted with black gesso, then dried with a heatgun and silver ink was splattered using silver Izink pigment ink (from a bottle).   The word "Hello" was made using Izink Diamond glitter paint (can be used like a texture paste) through a stencil I have in my stash, it was also used as a paint on the backing card for the sentiment which is from an IndigoBlu stamp set.  All of the flowers were from a Dawn Bibby Creations kit, they were coloured using an alcohol marker and Izink pigment ink (from a bottle). The chipboard is from my stash and coloured using Izink texture paste.  

I'm not really an orange person but I actually love how this looks, maybe a colour I need to use more often.

Until next time...........

Happy crafting x

Thursday, 15 February 2018

MAWTT Challenge


Well after all the rain lately it was wonderful to wake up to beautiful sunshine. It's still a bit breezy but lovely for a nice brisk walk then home for a cosy cuppa.

MAWTT has a new challenge starting today, Mrs Duck is hosting and the theme is "Things From My Chosen Song".   The words are as follows:-

Seagulls and aeroplanes
Things of the sky
Winds that go howlin'

Breezes that sigh

City sights

Neon lights

Grey skies or blue

Here is my DT card


I used pieces from a pack of Tim Holtz ephemera, chipboard letters & metal corners, oxide inks to colour the blue background, natural hemp twine and a sentiment from a Dawn Bibby Creations stamp set.

Pop over to MAWTT to join in the challenge.

Until next time............
Happy crafting x


Monday, 12 February 2018

Seascape Canvas

Back doing what I love!! 
Spent the whole day in my craft room and it felt amazing  
The first few hours just messing about but then I decided to design / make the canvas that I promised Ben I would make for the upcoming launch of The Craft Show on 1st March (all you crafty people need to pop over and take a look, why not like their facebook page to keep up to date with all the news.
The back of the canvas was painted using Koh-I-Noor magic paints, the chipboard letters were stippled with IndigoBlu coarse texture paste (love this product) then painted with acrylic paint, a tiny touch of distress crayons were used to highlight. The beach was painted using the acrylic paint too then a net from a bottle of booze was cut up to lay across the corner, craft rope from the range was hot glued around the canvas and Creative Expressions dies were used for the fish, shells, anchor, seaweed etc.


It feels so good to be back!!!    Hope you like it.

Until next time..............
Happy crafting  xx

Thursday, 18 January 2018

Clean and Simple Wedding Card


Well it has been a while since I blogged due to family illness, but hopefully back now.

It's a bit late but I do hope you all had a wonderful Christmas and wish you a very happy New Year.

Today is the day for Team A DT to show their cards for the MAWTT (Moving Along With The Times) blog challenge.  Amy has chosen clean and simple as her theme.

My entry is a Wedding or Anniversary card, I used Mama Makes Wedding Wishes stamp set which covers not only Wedding but Engagement, Anniversary, Save The Date and more. This stamp set has been designed by Loti who owns the Company, a wonderful lady inside and out.  The stamps are fantastic quality and are great value for money.


As you can see I have stamped the rings in each corner, the wedding couple (which are separate stamps so can be used on their own) and the sentiment were then stamped onto a white die cut shapes and put onto the card using foam pads.  All images were stamped with Versamark ink and gold embossing powder was used for a bit of sparkle.

I apologise for the quality of the photograph, a new camera is required very quickly.

Hope you like my little piece of inspiration and decide to pop over and enter the challenge yourself.

Until next time............

Happy crafting xx


Thursday, 7 December 2017

Twas The Night Before Christmas

Well it's been a while since I blogged but I'm back (hopefully!).....

I have had two family members in hospital and moved one half of my Business into new premises AND it's "that" time of year so getting back into my craft room is a major achievement and one that I intend to make more time for.

Anyway, just a quick post to let you know I haven't gone missing totally 😆

Here is a quick, simple card I made for the MAWTT challenge blog, the theme was an element from the "Twas The Night Before Christmas" poem.  I used part of a baby Groovi plate with red parchment for the main picture, a red bow, foiled sentiment, gold star brads and a deckle edge card.


I really enjoy the Groovi plate system, must make a note to use it with more projects.

Promise not to leave it too long before my next post.

Happy crafting
xx